Tutorial: Trace Photos
This tutorial describes how to use Vector Magic Desktop Edition to produce interesting visual effects with photographs. This process is typically called vectorization or tracing. Photo vectorization is often done by hand, but this tutorial explains how you can use Vector Magic to make that process fast and easy for certain types of photographs.
What kind of images does this tutorial apply to?
This tutorial does apply to:
- Photographs, especially those with high contrast, such as silhouettes
It does not apply to:
- Scans of artwork that was originally drawn or printed on paper. See separate tutorial
- Bitmaps that were digitally rasterized from a vector art original. See separate tutorial
- Images drawn in a bitmap editing tool like Photoshop.
What do I need to follow this tutorial?
-
This tutorial uses Vector Magic Desktop Edition. You can download a trial version from the desktop application page.
-
The Online Edition is very similar to the Fully Automatic mode in the Desktop Edition. The user interface looks slightly different, and there's no transparency support. With those caveats in mind, you can also use the Online Edition to follow this tutorial.
Photos vs. Logos
In Vector Magic, we distinguish between vectorizing logos (a word we use to mean any sort of flat-shaded illustration that has been or should be vector art), and vectorizing photographs.
With logos, there is usually a correct vectorization. Typically, someone drew the logo in a vector editor originally, and the goal of vectorization is to recover that lost original. We call this "reconstructive" vectorization because the goal is to reconstruct the original vector art.
With photos, the situation is not so simple. There is no single correct answer when vectorizing a photo. What result should be given depends on what the user is looking for. We call this "inspirational" vectorization because the photograph serves as inspiration for the vector art.
Vectorizing high-contrast photos
Of the various types of photograph vectorization, the one I find the most compelling is the vectorization of high-contrast scenes, especially those containing silhouettes. This section will describe some tricks for getting good results when doing this type of vectorization.
Gulls in silhouette
Consider the following source image(shown at reduced size, full size image available here):

A neat trick is to use the "Logo with Blended Edges" mode rather than the photo mode. The photo mode uses as many colors as the algorithm deems necessary to achieve a certain approximate error. The logo mode lets you pick the number of colors to use. It can produce a neat effect to select a small number of colors in an image like this one.
Try the settings:
- Basic Wizard
- Logo with Blended Edges (anti-aliased)
- Low Quality
- Fixed Colors (3 colors)
This results in the following vectorized result (available in SVG format here):

This result is in stark contrast to the result from the photo mode (download the SVG here):

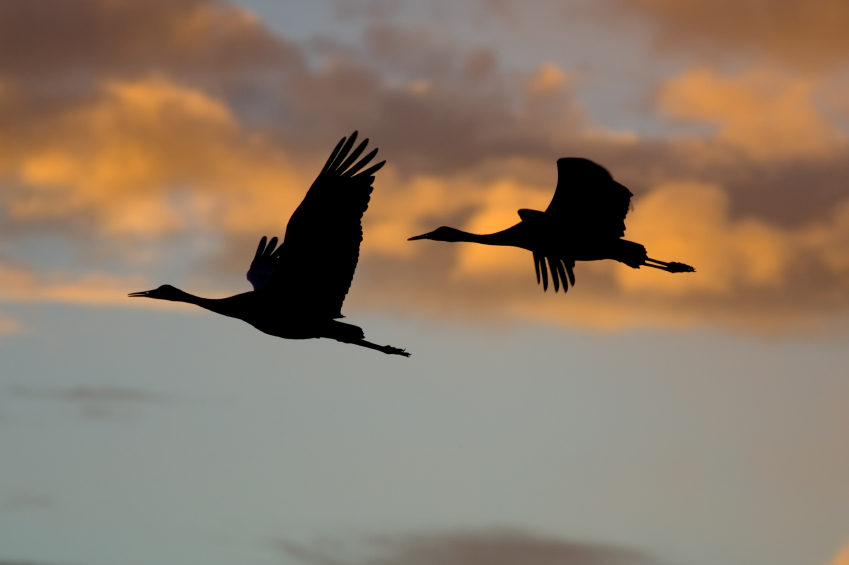
Sandhill Cranes in flight
Another interesting photo of birds in silhouette is this one of some Sandhill cranes in flight (full sized version available here):

Again, by restricting the palette, we can achieve an interesting visual result. Here, the settings are Logo with Blended Edges, Medium, 5 Fixed Colors. The SVG can be downloaded here and a preview is shown below:

This can be compared to the result when using the photo mode (SVG available here):

One interesting thing you can do with a vectorized photo is to extract only a part of the photo for inclusion in a different composition. For example, the image below shows the cranes over a plain white background. They would make a nice little graphic for a newsletter for an organization with Sandhill or Crane in the title.

Vectorizing other photographs
It is also possible to achieve an interesting visual effect on other photographs. Consider this picture of a sunset over the clouds (full-sized version here):
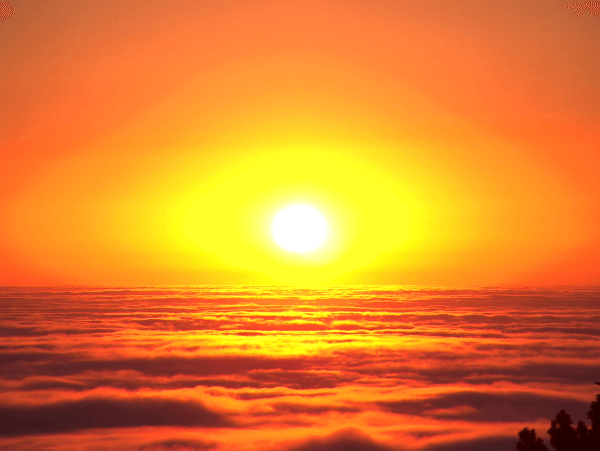
When processed on the low photo mode, the result is (available in SVG here):

Or this photograph of a Rodin sculpture (full-sized version here):
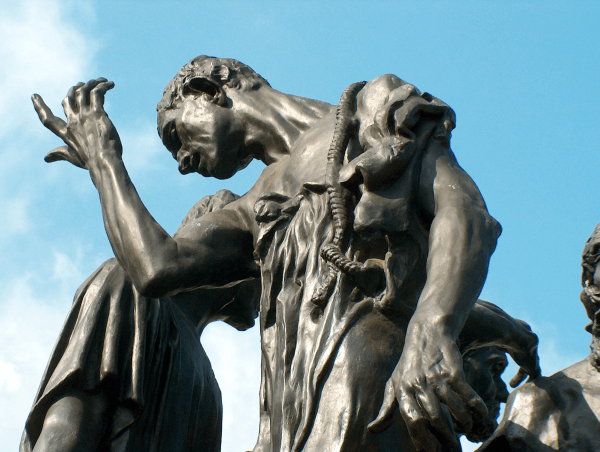
When processed on the medium photo mode, the result is (available in SVG here):


